I am sure you have seen these before. I call them Flannel Ragged Blankets, they are also called rag quilts, ragtime quilts, and many different variations along those lines.
I make flannel ragged blankets all the time, so I decided I would write up a tutorial on how to make one yourself. I have also included a pattern and some tips I have learned from my own experiences.
They are a bit time involved, so you can always just order one from me, and that will only take you a few clicks of your mouse! But, for those of you who have a sewing machine, here is how you can create one.
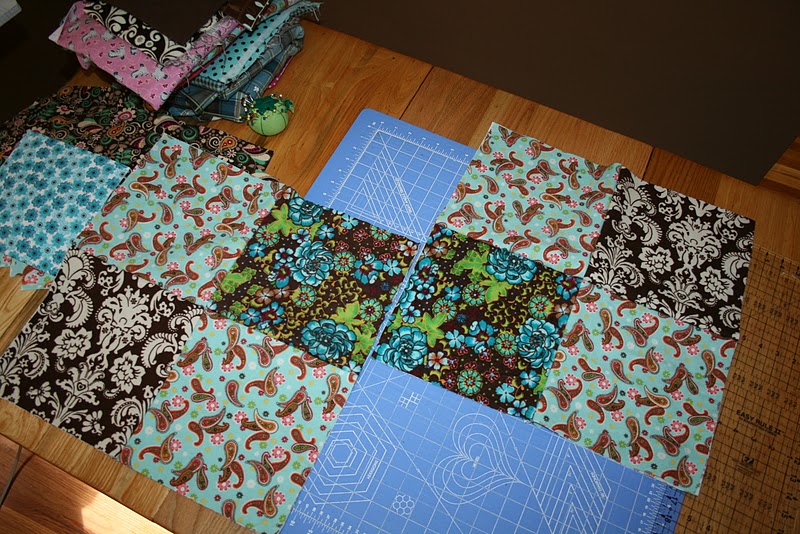
First, you will want to head out and buy some flannel material, unless you have a collection of fabric on hand, like me. You will be about *3.5 yards of flannel, but always get extra to account for shrinkage and then go ahead and get a little more extra, so you don't run out of what you need. For this blanket I used 7 different flannels, but you would really only need 3 and 5 would be ideal.
Once you get your fabric home, you need to wash and dry it. If you skip this step, the blanket will shrink funny when you wash it later and you will end up with a wonky blanket, don't skip this step!
(*this figure is based on having 20 inches of usable flannel when it is folded in half and after it is pre-washed, if you flannel is less than that measurement, you will need more flannel)
Below is my drawn out pattern.
Ready to cut your material? You may need to iron your material after you wash and dry it. I know it is a pain, but you need to have flat material so you can get square, squares when you cut it. All the measurements that follow are for cutting two layers of material at a time. Fold the flannel in half like it is when you buy if off the bolt, right sides facing out. Make sure that the layers are smoothed together with no wrinkles.
You will need:
1- 8x8 inch square
4- 8x18.5 inch rectangles
16 - 10x10 inch squares
I used 5 different materials to make the 16 10 inch squares, but you really would only need to have two different materials for that. I was using what I had on hand that went together.
Cutting the 8x18.5 pieces, use a rotary cutter and board to make quick work of this cutting.
Here is everything cut out, from the left, the 10-inch squares, the big rectangles and the 8-inch square
Now to start sewing together, take two squares, (remember that each square is double sided, so you are actually sewing together 4 squares in this step) line them up and sew along one edge.
I use 3/4 of an inch seams and you MUST USE A WALKING FOOT! If you don't use a walking foot, the material will sheer and you will end up with a wonky blanket! If you choose to use a different seam allowance, such as 1/2 inch or 1 inch, the measurements for the pieces will be different, so keep that in mind.
(Tip: when purchasing a walking foot, do not get one that has plastic for the bracket piece that is next to where the foot gets screwed onto the sewing machine, I went through two of those kinds before I found this one that has a metal bracket piece. The plastic can't take the pressure and it brakes after a couple blankets.) I have included some photos, so you can see what I am talking about.
My sewing machine settings, straight stitch, stitch length of 3
sew along the length of the side, back stitch at the start and end of the side
here are the first two sets that I have sewn the 2 squares together for
take the top set and with the seam facing out, smooth side in, sew along the edge
(Tip: always double check which way your seams are facing before you sew. All of your seams will be out on one side of the blanket and the other side will be smooth when you are finished)
While you are sewing, make sure that you are holding the center seams lined up, this way once you get to them, they won't be off
lay the seams flat before you sew over them
double check again and make sure your center seams are lined up
backs-stitch over the center seams and continue to the end (you probably don't have to do this, but I do, just to make sure that this blanket will last!
After the center, line up the ends of the squares and hold them tight while you are sewing the rest of the way down.
Back-stitch over the center seams
first two sets of 4 sewn together, smooth sides
first two sets of 4 sewn together, seam sides
Repeat the process with the other two sets of 4 squares.
This is what you end up with
now you will be sewing in your long rectangle, it should be just the right length to go along the side of your 4 squares. your squares were 10 inches, two of them equals 20 inches, minus the seam allowance of 3/4 of an inch, twice, so 1.5 inches. 20-1.5 = 18.5
Lay the rectangle piece on top and line up the corners and the edge, sew along that side.
(Tip: it helps to sew with the rectangle side down and the seams up, so when you come to the seam, you can just lay it flat as you sew over it, and not have to lift it up from the bottom to get it to lay flat.
Repeat the process with the next set of 4 squares, the seams are up, which means the seams are out
Repeat the process with the top two set of 4 squares
now take the other two long rectangles, and sew them to the 8-inch square
This is what the blanket will look like when done, almost there!
Sew the bottom section to the center section, make sure you keep the ends and the center seams lined up as you sew. Now sew the top section to the other side of the center section and it is all put together!
The last step is to sew 3/4 of an inch in around the outside of the blanket, this keeps the outside flannel pieces together
3/4 inch in from the edge with the seams laid flat

Get a special ragging shears for cutting the fringe, it looks like this...
It has a very short blade and it is spring loaded. It will take you at least twice as long to fringe the seams if you use a regular scissors and you hand will be sore for a couple days!
Rag around the outside of the blanket, make the fringe about 1/4 of an inch apart
(Tip: DO NOT SNIP THROUGH YOUR THREAD! If you do, it isn't the end of the world, but you should go back and stitch over the snip a couple times, just to make sure that seam doesn't come apart)
snip next two the sewn flat seams and then fringe the seams of the blanket
This blanket took about 40 minutes to fringe! You may want to listen to something or watch a movie while you do this!
Some quick pictures outside before it starts to rain:
ragged side
Smooth side

Close-up Shot


 There, isn't it adorable! Every little boy needs a truck like this! Especially when it is made for them by a loved one!