I am very excited about this opportunity for Honeybunch Boutique to donate to a good cause! During the month of June, 10% of all sales made in my Etsy shop will be donated toward this wonderful family, who is getting ready to adopt.
Here is a message from Rebecca...
We are Luke and Rebecca and we are in the exciting process of growing our family through adoption.
We became pregnant with our son after two years of trying, during which I had three miscarriages. We were blessed with our beautiful, little boy and life was wonderful. When our son was almost four months old, I was diangosed with stage 3 breast cancer.
While I am now 100% healthy and cancer free, the chemo treatments left me infertile, with no hope of having biological children. Just months after our diagnosis, God led our hearts to adoption. We finished our home study and began actively waiting in early March.
We're trying to raise funds to help offset the fees associated with adoption and appreciate your encouragement and support!
Rebecca contacted me two weeks ago, via Etsy Conversation, and we are both very excited and optimistic about working together for the month of June. She will be posting on her blog, linked above, and they will also be featured on an adoption blog, Filled With Praise.
We wish them all the best!
May 28, 2011

May 27, 2011
Donations @ Honeybunch Boutique - We Got Your BACK!
Honeybunch Boutique will be donating several items to the Golf Tournament and Benefit for my 17 year-old cousin, Whitney. Money from the Golf Tournament as well as from a Raffle/Auction will go to help pay for medical bills related to the five surgeries she has had over the past 2 years.
Whitney's Story:
Whitney had back surgery in July of 2009 to correct severe scoliosis. Her recovery proceeded as expected until December of 2010, when she started having pain and found a lump on her back. This brought her to Mayo to see her doctors. They decided that she had developed an infection, but were unsure what was causing it.
They ran many test and Whitney went through two more surgeries to clean out the infection around her spine. She had a PICC line placed to receive IV antibiotics and was prescribed other medications as well. She seemed to be on the road to recovery until April 2011. She developed another lump and had allergic reactions to her medications. The infection was back.
This time the doctors repeated the previous surgery to flush out the infection. Two days later, when the infection persisted, they decided to do yet another surgery. This would be her 5th. This time the doctors hoped to completely take out any possible cause of the infection. They removed hardware and it was discovered that the infection had completely surrounded it. They cleaned away the infection in her spine and placed two new 19-inch rods and 22 new screws. The previous three surgeries to irrigate and flush out the infection had been unsuccessful, because the infection remained under the hardware the whole time. The doctors are hopeful that the infection will not return.
Whitney has been through 5 different surgeries and has spent 23 days in the hospital, as well as countless hours in the clinic. She is a very beautiful, strong person and she has gone through so much in the last four months.
Her siblings are hosting a benefit in honor of her success and to help cover some of the medical bills that have accrued. The Benefit will be on her Golden Birthday, June 18th.
If you would like to contribute, you can e-mail her siblings at benefit4whitney@
Find the Facebook Event Page for the Golf Tournament and Benefit by clicking on the link.
You can watch an interview with Whitney, KTTC video about Whitney, by clicking on the link.
I will post on the items I will be donating at a later date.
 |
| Whitney during 1 of her 23 days in the hospital |
Whitney's Story:
Whitney had back surgery in July of 2009 to correct severe scoliosis. Her recovery proceeded as expected until December of 2010, when she started having pain and found a lump on her back. This brought her to Mayo to see her doctors. They decided that she had developed an infection, but were unsure what was causing it.
They ran many test and Whitney went through two more surgeries to clean out the infection around her spine. She had a PICC line placed to receive IV antibiotics and was prescribed other medications as well. She seemed to be on the road to recovery until April 2011. She developed another lump and had allergic reactions to her medications. The infection was back.
This time the doctors repeated the previous surgery to flush out the infection. Two days later, when the infection persisted, they decided to do yet another surgery. This would be her 5th. This time the doctors hoped to completely take out any possible cause of the infection. They removed hardware and it was discovered that the infection had completely surrounded it. They cleaned away the infection in her spine and placed two new 19-inch rods and 22 new screws. The previous three surgeries to irrigate and flush out the infection had been unsuccessful, because the infection remained under the hardware the whole time. The doctors are hopeful that the infection will not return.
Whitney has been through 5 different surgeries and has spent 23 days in the hospital, as well as countless hours in the clinic. She is a very beautiful, strong person and she has gone through so much in the last four months.
Her siblings are hosting a benefit in honor of her success and to help cover some of the medical bills that have accrued. The Benefit will be on her Golden Birthday, June 18th.
If you would like to contribute, you can e-mail her siblings at benefit4whitney@
Find the Facebook Event Page for the Golf Tournament and Benefit by clicking on the link.
You can watch an interview with Whitney, KTTC video about Whitney, by clicking on the link.
I will post on the items I will be donating at a later date.
May 26, 2011
Donations @ Honeybunch Boutique - A New Lung
I have been given not one, not two, but 3 opportunities recently to donate items and funds toward good causes. Over the next 3 days I will be posting about these causes in turn.
The first donation will a hooded towel that is going toward an auction, held by Aim Photography in Oregon, for a 27 year-old man who needs a lung transplant. He is married and has a 20 month old daughter. Their medical expenses have been rising and will continue to do so even after he gets a transplant. The doctors say that he needs to get a new lung in the next seven months. We wish him the best.
Read this article for more information on his story.

The first donation will a hooded towel that is going toward an auction, held by Aim Photography in Oregon, for a 27 year-old man who needs a lung transplant. He is married and has a 20 month old daughter. Their medical expenses have been rising and will continue to do so even after he gets a transplant. The doctors say that he needs to get a new lung in the next seven months. We wish him the best.
Read this article for more information on his story.

I don't have the towel finished yet, but It will be identical to the ones on the left.
May 17, 2011
Giveaway: Tie Onesie or T-Shirt
You can win a tie onesie or T-shirt in the size, style and color of your choice, even one for adults! Just send your friends to Honeybunch Boutique. For each friend that writes on the wall or comments on this album and says you sent thenm, you get another entry! You also can get 1 entry by commenting on this album or writing on the wall yourself, and letting me know you want to enter the giveaway. The more friends you refer, the more entries you get. I will also giveaway a special prize to the one with the most referrals from today thru Friday! Enter until Thursday night, winner will be announced Friday morning.
Here are some examples of onesies and T-shirts I have made.



Here are some examples of onesies and T-shirts I have made.


May 15, 2011
Tutorial: Stuffed Animal - Elephant
Here is a tutorial on how to make a stuffed animal, in this case an elephant, but you could follow the same steps with any kind of animal you want.
 1st, draw out your pattern. I made mine on the computer and used a print as inspiration for the shape of the elephant. Just use the basic body shape and then make a copy of the lower half of the body. Cut out 2 of the body, 2 of the belly and 4 or the ears. Make sure you have two layers of material, with the backs facing together, when you cut them out. This way you will have two opposite pieces of material and you only have to cut out each shape once.
 I poked a hole where the eye was supposed to go and marked it with a marker on the material, so I would know where to sew on the eye later.
 Trace out your pattern on the material, you may need to enlarge the photo to see the lines.
 Pin the two layers of material together and cut out your shapes.
 Making the ears and the belly/legs, put the right sides of the material together, sew around the ears, leaving the tops open and sew along the top/center of the belly. (In hind sight, I would not have made the elephant's belly so rounded, it turned out cute, but the elephant looks pregnant :)
 Iron the seam on the legs flat. Turn the ears inside out and top-stitch 1/8 inch in around the edge. (If you want, you could stuff the ears to make them more substantial)
 Pin the ears in place, make sure they are the same one both sides of the elephant.
 Sew the ears on only along the top of the ear, this way they flap.
 Pin the legs to the body with the right sides facing each other. (Note: If you look closely, you will see that I have the elephant body right side facing out, I had to rip out my stitches and redo this step, don't do what is show in the picture!) Sew 1/4 inch in, from the center seam of the belly on one end of the elephant to the center seam on the other end of the elephant. DO NOT go past the center seam, even one stitch! Once you have the legs sewn attached on one side, sew on the other side of legs to the other half of the elephant body.
 Make the tail. I used 3 strands of embroidery floss, braided together and tied at both ends, you can use yarn.
 Place the tail, remember you will be turning the elephant inside out when it is finished, so you need to place the tail in the opposite direction of where you want it to end up. I wanted the tail to angle up a little, so I angled it down when placing it.
 Lay the two pieces of elephant body flat and pin around the elephant body. Sew from one end of the elephant around to the other end. Make sure you do not sew through the leg material, even one stitch, it will pull the material up funny when you try and turn it inside out. This is a difficult start and stop stitching part, but just go slow and be precise. Your stitches need to meet up perfectly, but not overlap.
 Now, once we get to this point, you may wonder how we are going to turn the elephant inside out, because we have completely sewn around the entire elephant! I opened up the belly by double stitching along the belly the seam about 1 inch back from the front of the elephant and then again about 3 inches back from there. I then ripped out the seam in between where I double stitched. Why? To keep the seam from coming apart. Why not just do this to begin with? I think it made it easier to sew the pieces together, having a solid stitch through the two belly pieces.
 Ok, turn the elephant inside out, this is the fun part! It helps if you push out from the inside along the seams, to flatten them out.
 Stuff the elephant, it is up to you how 'stuffed' you want to make your elephant, you can really pack in the stuffing, or leave it a bit loose for a squishier elephant. Once you have it stuffed, you need to put the eye on. This is where making the spot for the eye ahead of time is really helpful. Thread a needle, get the buttons you want to use for your eye, and use the dots you marked as a guide for where to sew the eyes on. Pull the thread through the elephant's head and place another button on the other side, so you sew on both eyes at the same time, threading back and forth, from side to side several times. You also need to sew the belly closed. You can do this however you want, and don't worry if it is not perfect, this is a handmade gift and that is a detail that will show that it is!
 Finished elephant, left side
 Finished elephant, right side, notice the pregnant belly :)


May 10, 2011
Tie Onesies and Shark
What I have made in the past couple days.


Tie Onesie, great for dressing up your little man in the summer time!
White onesie with Blue Geometric tie, 3-6 months
White onesie with Blue Geometric tie, 3-6 months


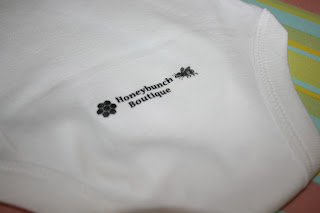
HB logo on the butt :)
Blue Striped onesie with Blue Swirl tie, 6-9 months


Shark Stuffed Animal


Belly

May 9, 2011
Giveaway: Hooded Towel
This week's giveaway is a hooded towel! It is 26x35 with an 8.5x9 inch hood. It is perfect for toddlers, and will work for ages 6 months - 2 years. These towels are great for all ages, and I can make them in infant, toddler and child sizes.
To enter this giveaway, comment on this post, indicate that you want to enter the giveaway and make sure you INCLUDE YOUR NAME.
You can also enter to win on Facebook, just comment on the Hooded Towel Giveaway Album.


Pricing for the towels will be as follows:
Standard: basic towel, simple hood
Infant: $14
Toddler: $16
Child: $18
Upgraded: higher quality towel, simple hood
Infant: $16
Toddler: $18
Child: $20
Specialty: higher quality towel, designed hood or other embellishments
Infant: $21
Toddler: $23
Child: $25
To enter this giveaway, comment on this post, indicate that you want to enter the giveaway and make sure you INCLUDE YOUR NAME.
You can also enter to win on Facebook, just comment on the Hooded Towel Giveaway Album.

Aurelia modeling the Teddy Bear Towel


folded in half

laid out flat, 26x35

folded up
Pricing for the towels will be as follows:
Standard: basic towel, simple hood
Infant: $14
Toddler: $16
Child: $18
Upgraded: higher quality towel, simple hood
Infant: $16
Toddler: $18
Child: $20
Specialty: higher quality towel, designed hood or other embellishments
Infant: $21
Toddler: $23
Child: $25
Subscribe to:
Posts (Atom)